Choosing the right Screw & Washer combination begins with understanding the joint, not the package label. A small fastener may hold a light panel, secure vibrating machinery, or support a weather-exposed frame. Each situation demands different materials, threads, washer types, and tightening methods. The wrong choice can cause loosening, surface damage, corrosion, or uneven clamping pressure.
John H. Bickford, a respected authority on bolted-joint design, wrote, “A bolted joint is a system, not merely a bolt.” That principle remains practical today. The screw, washer, connected materials, installation torque, and surrounding environment must work together. Stainless steel may resist moisture, but it can still gall during installation. A hardened washer may distribute force better, yet it may damage a soft surface without suitable protection.
Small details matter.
This guide presents seven practical tips for selecting the right Screw & Washer combination. It considers load direction, vibration, material compatibility, washer diameter, thread engagement, corrosion exposure, and installation control. Real workshop experience also teaches an uncomfortable lesson: a technically correct fastener can still fail when workers choose by appearance alone. I have seen oversized washers used with insufficient thread engagement, creating confidence without real strength. That mistake is easy to miss.
Reliable selection requires product specifications, verified dimensions, and testing when the application carries serious loads. Standards and manufacturer data should guide the final decision. These tips offer a clear starting point, but every demanding assembly deserves careful engineering judgment.
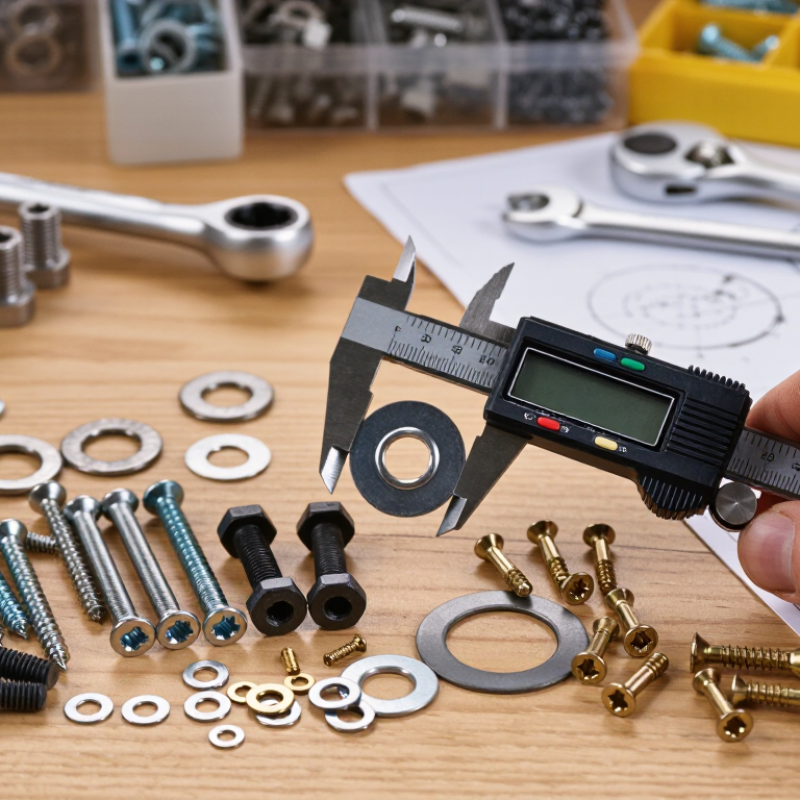
Choosing the right screw and washer starts with defining the joint’s purpose. A roof panel joint faces different demands than a machine guard. Ask whether the connection carries tension, shear, vibration, sealing pressure, or repeated adjustment. Record the expected load, temperature, movement, and service life before selecting hardware.
The base materials matter just as much. A screw entering soft aluminum, plywood, or thin sheet metal can strip the hole or crush the surface. A broad washer spreads pressure and reduces pull-through. Harder bases may need a flatter, stronger washer. Corrosion also changes the decision. ISO 9223 classifies atmospheric corrosivity from C1 to CX, so outdoor exposure should not be treated like indoor storage. Galvanic contact between dissimilar metals deserves careful review.
Thread strength is only part of the joint. NASA’s Fastener Design Manual, NASA-RP-1228, explains that roughly 90% of tightening torque may be consumed by friction rather than bolt stretch. The exact percentage varies. That uncertainty is easy to underestimate. ISO 16047 provides torque-tension testing methods, which are more dependable than copying a torque chart without checking lubrication and surface condition. In practice, I have seen a correct screw fail because the washer was too small. The shortcut looked efficient. It was not.
| Tip | Joint Definition | Key Data to Check | Recommended Screw Selection | Washer Selection | Practical Example |
|---|---|---|---|---|---|
| 1. Define the joint’s purpose | Determine whether the connection must clamp parts together, resist shear, support tension, permit adjustment, or allow repeated disassembly. | Permanent or removable joint; static or vibrating service; access for future maintenance. | Use machine screws or bolts for serviceable joints. Use thread-forming screws for suitable thin materials when no nut or tapped hole is available. | Use a plain washer when you need load distribution or surface protection. Use a locking washer only when its design is appropriate for the joint and installation conditions. | A removable equipment cover generally uses a machine screw with a plain washer rather than a permanent rivet or adhesive. |
| 2. Calculate the load and preload | Identify direct tension, shear, bending, vibration, and any combined loading. | Applied force, number of fasteners, load direction, safety factor, joint stiffness, and required clamping force. | Select diameter, strength class, and engagement length based on the calculated load. Do not size a fastener from diameter alone. | Choose a washer with an outside diameter and thickness sufficient to prevent local yielding, pull-through, or surface damage. | A load-bearing bracket may require a larger-diameter fastener and hardened load-distribution washers than a light-duty enclosure. |
| 3. Match the base materials | Confirm whether the fastener joins steel, stainless steel, aluminum, plastic, wood, or mixed materials. | Material hardness, thickness, thread-forming capability, risk of crushing, and risk of galvanic corrosion. | For soft materials, use adequate thread engagement, a nut insert, or a large bearing area. For thin sheet, use a suitable self-drilling or thread-forming screw. | Use a larger plain washer on soft sheet, wood, and plastics to reduce bearing stress and prevent pull-through. | When fastening aluminum, avoid bare dissimilar metals where moisture can create galvanic corrosion; use compatible finishes or an insulating layer where appropriate. |
| 4. Select the correct thread and length | The screw must engage the supporting thread correctly without bottoming out or projecting excessively. | Nominal diameter, thread pitch, grip length, hole diameter, thread engagement, and clearance requirements. | Use one compatible thread system throughout the joint. For a tapped metal hole, select a screw with matching nominal diameter and pitch; for through-bolting, match the nut and bolt thread. | The washer hole should provide clearance for the screw without allowing the head or nut to pass through. | An M6 screw must be paired with an M6-compatible nut or tapped hole; an incorrect pitch can damage threads or prevent full engagement. |
| 5. Choose the screw head and drive | Select the head style according to clearance, seating surface, tool access, and the need for a flush finish. | Available space, required torque, installation tool, countersink angle, and risk of tool slip. | Pan and hex heads provide practical bearing surfaces. Countersunk heads require a properly prepared countersink and should not be forced into a flat hole. | Use a washer only where it can seat flat under the selected head or nut; avoid using a flat washer under a countersunk head unless specifically designed for that purpose. | A flush panel may use a countersunk screw, while a structural bracket commonly benefits from a hex-head screw with a plain washer. |
| 6. Account for environment and corrosion | Evaluate moisture, salt, chemicals, temperature, outdoor exposure, and contact with dissimilar metals. | Corrosion category, operating temperature, coating durability, chemical compatibility, and maintenance access. | Use a corrosion-resistant material or protective coating suitable for the environment. Stainless steel grades intended for general or higher-corrosion service differ in resistance. | The washer coating or material should be compatible with the screw and base material; a washer with a damaged coating can become an early corrosion point. | Outdoor or coastal joints require more corrosion consideration than dry indoor assemblies, especially where water can remain trapped under the washer. |
| 7. Verify installation and long-term performance | The selected hardware must maintain clamp force and remain serviceable throughout the joint’s expected life. | Specified tightening torque, lubrication, prevailing torque, vibration, thermal cycling, inspection interval, and re-tightening requirements. | Follow the applicable fastener or equipment specification for torque. Do not automatically apply a generic torque value when material, coating, or lubrication differs. | Use a locking method proven suitable for the application, such as a prevailing-torque nut, thread-locking compound, or a mechanically locking washer system. | A vibration-prone assembly should be tested for clamp-force retention rather than relying on a washer type without verifying joint behavior. |
Consider humidity, pollution, and airborne salt. Indoor joints may need zinc protection. Coastal assemblies often need corrosion-resistant material and compatible washers. Check temperature limits too. No choice is perfect.
A washer spreads pressure and protects the surface beneath the head. It can rust first. Choose similar corrosion resistance and adequate hardness. Small parts matter.
Avoid mixing dissimilar metals without checking compatibility. Moisture can cause galvanic attack between them. Use compatible materials or suitable isolation. Recheck exposed joints after wet weather.
No. Salt-spray results help compare coatings, but they cannot perfectly predict outdoor service. Also review coating thickness, drainage, temperature, and trapped water. Testing helps, but it is not magical.
Coarse threads usually grip wood and soft materials better. Fine threads suit metal assemblies with prepared holes. Match the thread before judging appearance. A mismatch can strip the hole.
The screw should pass through the attached part and engage the base securely. Avoid hidden components. Choose enough diameter for the load, but avoid splitting fragile material. Measure twice.
Countersunk heads sit flush in prepared recesses. Pan heads need a flat supporting surface. Select a drive recess that fits the tool firmly. Slipping damages the head.
Use a washer when the head may pull into the surface. Its hole should fit closely, while its outer diameter spreads pressure. A lock washer may resist loosening. It cannot repair weak thread engagement.
Hand-start it to prevent cross-threading. Tighten gradually until the washer sits flat. More force is not always better. Check vibration, temperature, and material movement later. I might still miss poor drainage.
Choosing the right Screw & Washer combination begins with understanding the joint’s purpose, expected load, and base materials. Consider whether the connection must resist tension, vibration, shear, moisture, heat, or repeated movement. Then select a screw material and protective coating suited to the environment, especially where corrosion or temperature changes may affect performance. Thread type, screw length, diameter, and head design should match the materials being joined and the available installation method.
Washers should also be selected carefully based on their shape, outside diameter, thickness, and specific function. They may help distribute pressure, protect surfaces, improve grip, or resist loosening. Before installation, confirm that the screw and washer fit together properly and are compatible with the joint materials. Correct tightening, sufficient engagement, and regular attention to wear or corrosion can improve long-term reliability. A well-matched Screw & Washer system provides a secure, stable, and durable connection.

 Dongshuo